学校不让拉宽带,校园网流量又贵,才出此下策
参考教程 零基础教程 | 拥抱IPv6,30分钟实现校园网免流量和翻墙
原理:校园网IPV4流量计费,IPV6不计费。
VPS准备
以下以Google cloud为例
创建子网
文档 https://cloud.google.com/vpc/docs/create-modify-vpc-networks?hl=zh-cn#subnet-enable-ipv6
双栈子网同时具有 IPv4 和 IPv6 地址范围。
在 Google Cloud 控制台中,进入 VPC 网络页面。
点击某个 VPC 网络的名称以显示其 VPC 网络详情页面。
点击添加子网。在显示的面板中:
提供名称。
选择区域。
对于 IP 栈类型,请选择 IPv4 和 IPv6(双栈)。
输入 IPv4 范围。这是子网的主要 IPv4 范围。
如果您选择的范围不是 RFC 1918 地址,请确认该范围与现有配置不冲突。如需了解详情,请参阅 IPv4 子网范围。
选择 IPv6 访问权限类型:内部或外部。
如果您要将访问权限类型设置为内部,但内部选项不可用,请检查是否为网络分配了内部 IPv6 范围。
点击添加。
务必在防火墙规则设置中打开相应端口,比如ssh连接是tcp 端口22。
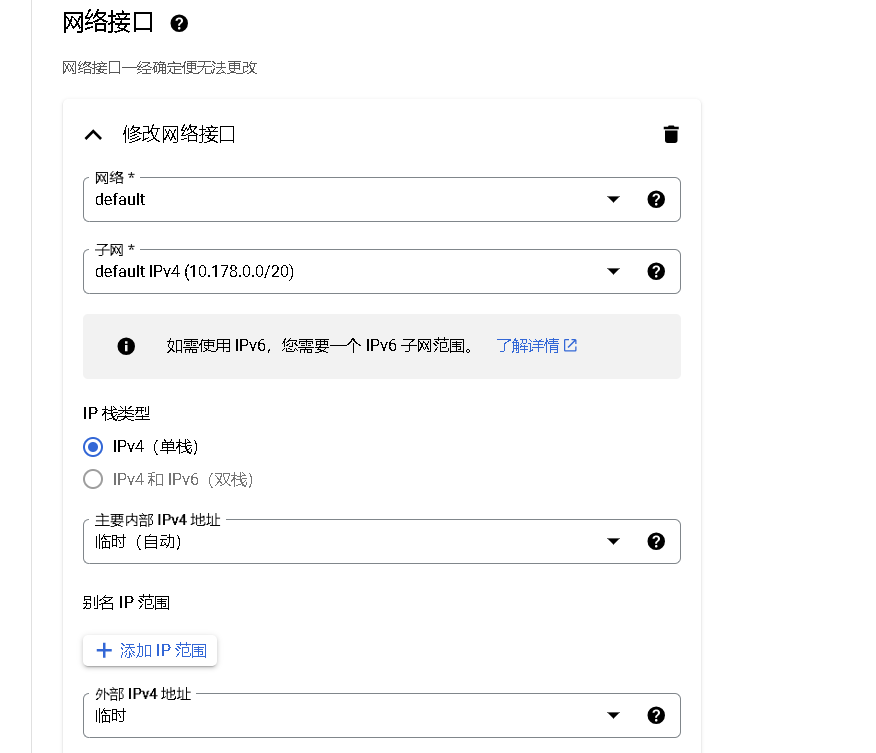
创建虚拟机
配置选最垃圾的也能用
主要是在高级选项-网络中选择之前创建的子网,IP 栈类型选择双栈。(子网的地域要和vps的地狱匹配)
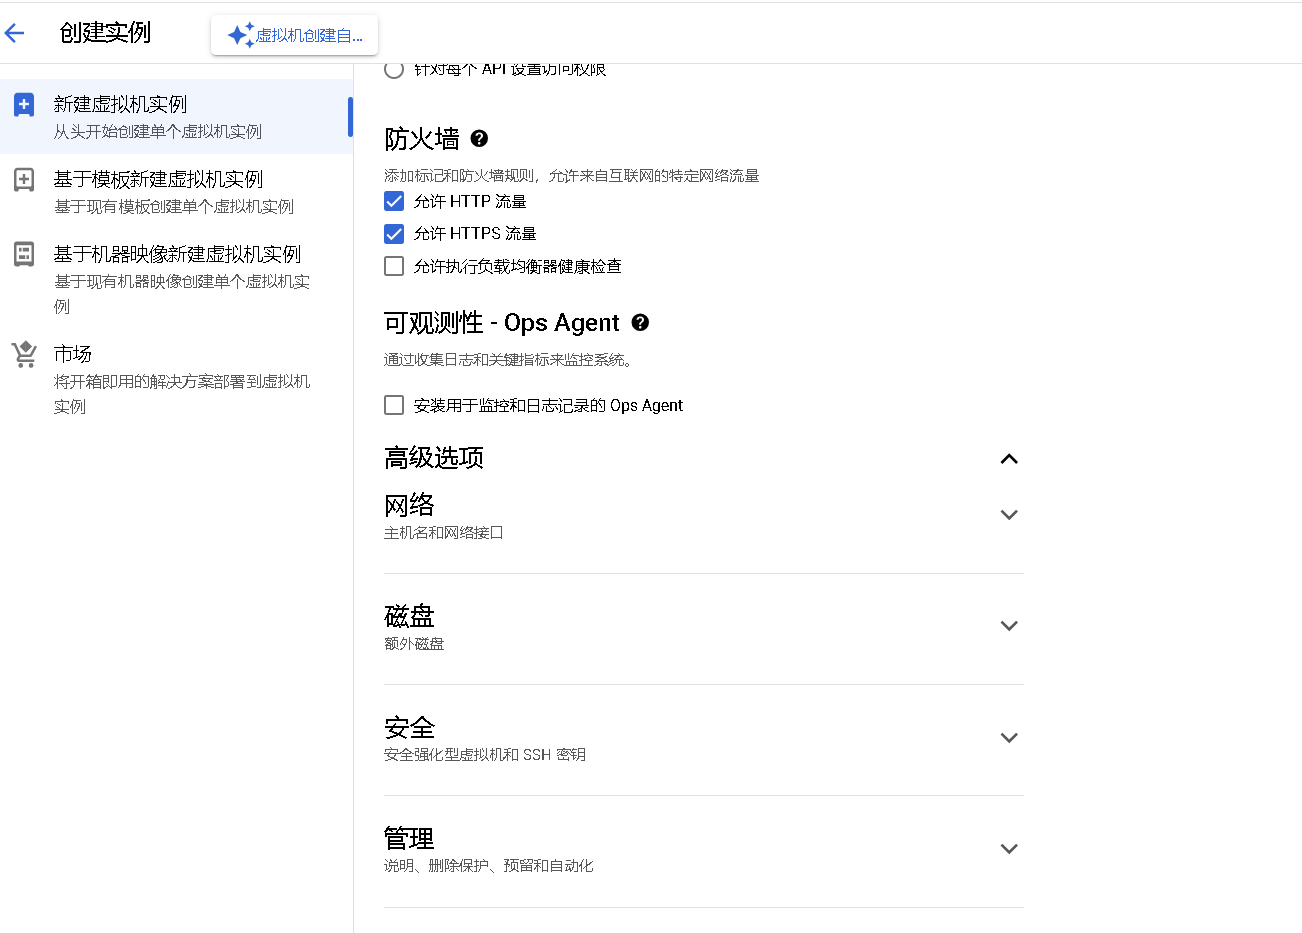
配置防火墙
主要是端口号
https://cloud.google.com/firewall/docs/firewalls?hl=zh-cn
配置Xray
x-ui的端口不要和节点入站端口重了
安装x-ui
临时root 用户 sudo -i
1 | # 中文版 |
1 | # for English users |
if the command doesn’t work try this break-up version instead.
1 | # change the working directory |
If it goes properly, you may asked to set up a password and username, and then the x-ui interface is set.
To check the configuration of x-ui:
1 | sudo x-ui |
You will see:
1 | x-ui 面板管理脚本 |
Type:
1 | 7 |
You will see:
1 | [INF] 当前面板信息[current panel info]: |
登录x-ui
记得在防火墙开放设置的端口号
- Go to the browser and type in the address block:
1 | http://[YOUR_IPV6_ADDRESS]:port/basePath/ |
For example my IPv6 address is 2600:1900:1134:268:: , my port is 12345, my basePath is /hp23/, then I should type:
1 | http://[2600:1900:1134:268::]:12345/hp23/ |
在入站列表添加节点,然后Window下载V2rayN连接节点就可以用啦
Turn on the BBR accelerator (Optional)
BBR is a TCP congestion control algorithm designed by Google researchers and built for the congestion of the modern internet, it can boost your network speed.
Method 1
1 | echo "net.core.default_qdisc=fq" >> /etc/sysctl.conf |
Method 2
1 | wget -N --no-check-certificate "https://raw.githubusercontent.com/chiakge/Linux-NetSpeed/master/tcp.sh" && chmod +x tcp.sh && ./tcp.sh |